Raising a Support Ticket
Helpdesk — Raising and Managing Support Tickets
1. Purpose
This guide explains how to register on the UnifyXperts Support Portal, log in, and raise a support ticket whenever you encounter an issue or have a query about the system.
Using the Helpdesk ensures your issue is tracked, assigned to the right person, and resolved within a committed timeframe.
2. Helpdesk URL
Always use this URL to access the Support Portal:
🔗 https://backoffice.unifyxperts.com/helpdesk/my-tickets
💡 Tip: Bookmark this URL. After logging in, you may sometimes be redirected elsewhere — always navigate back to this link.
3. Registration (First-Time Setup)
When your account is created, you will receive a registration email to set your password.
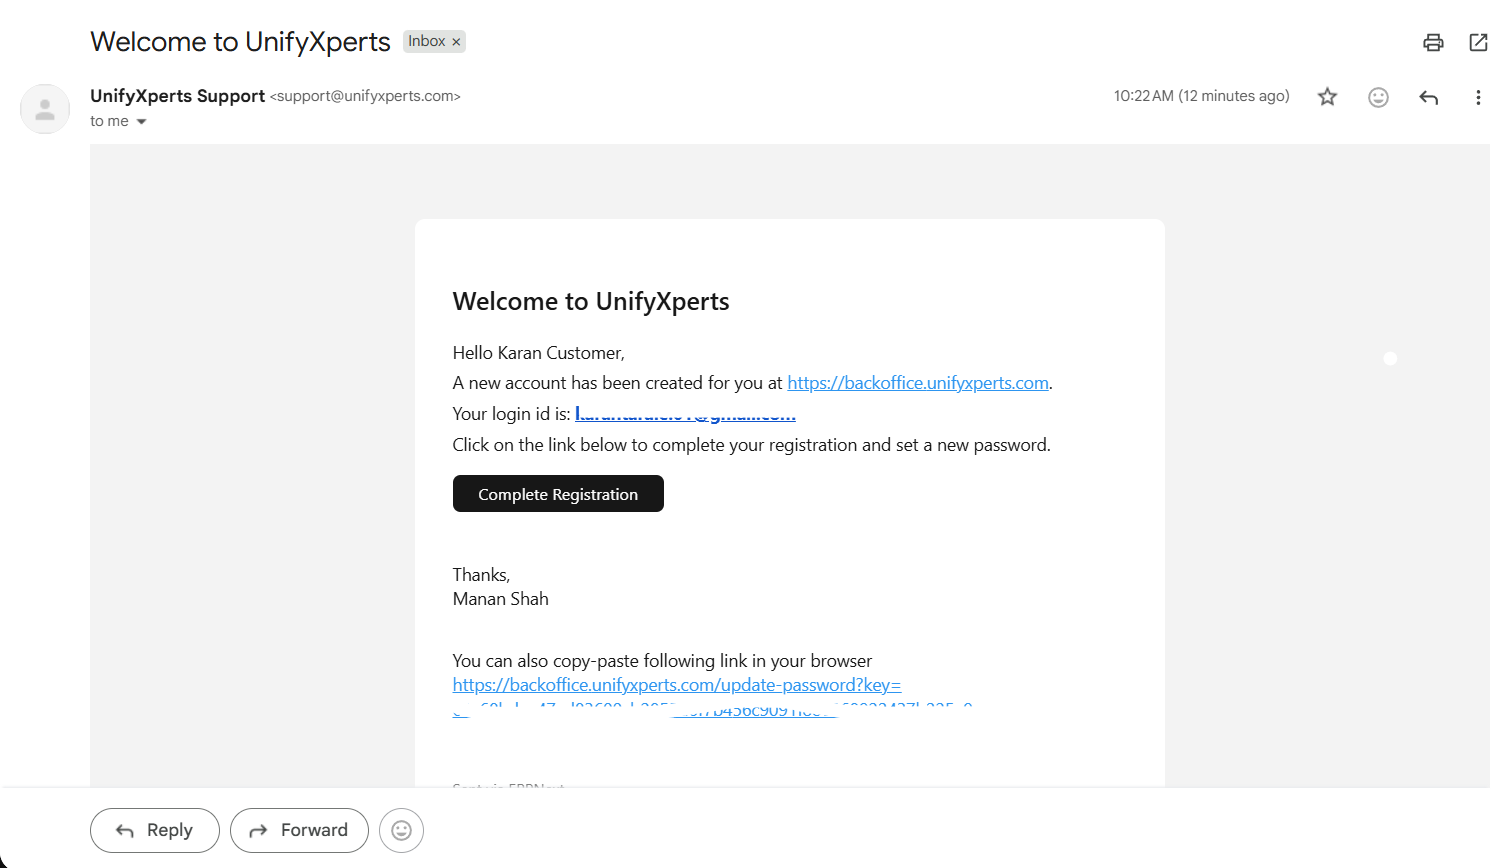
Steps:
- Open the registration email in your inbox.
- Click the link to set your password.
- Enter and confirm your new password.
- After setting the password, you may be redirected to another page — that is normal.
- Navigate to the Helpdesk URL to begin.
⚠️ Note: Registration is a one-time step. Once your password is set, use the Login page for all future visits.
4. Logging In
There are three ways to log in.
4.1 Regular Login
Enter your registered email address and password on the login page.
4.2 Login with Email Link (No Password Required)
Use this option if you do not remember your password.
On the login page, click "Login with Email Link".
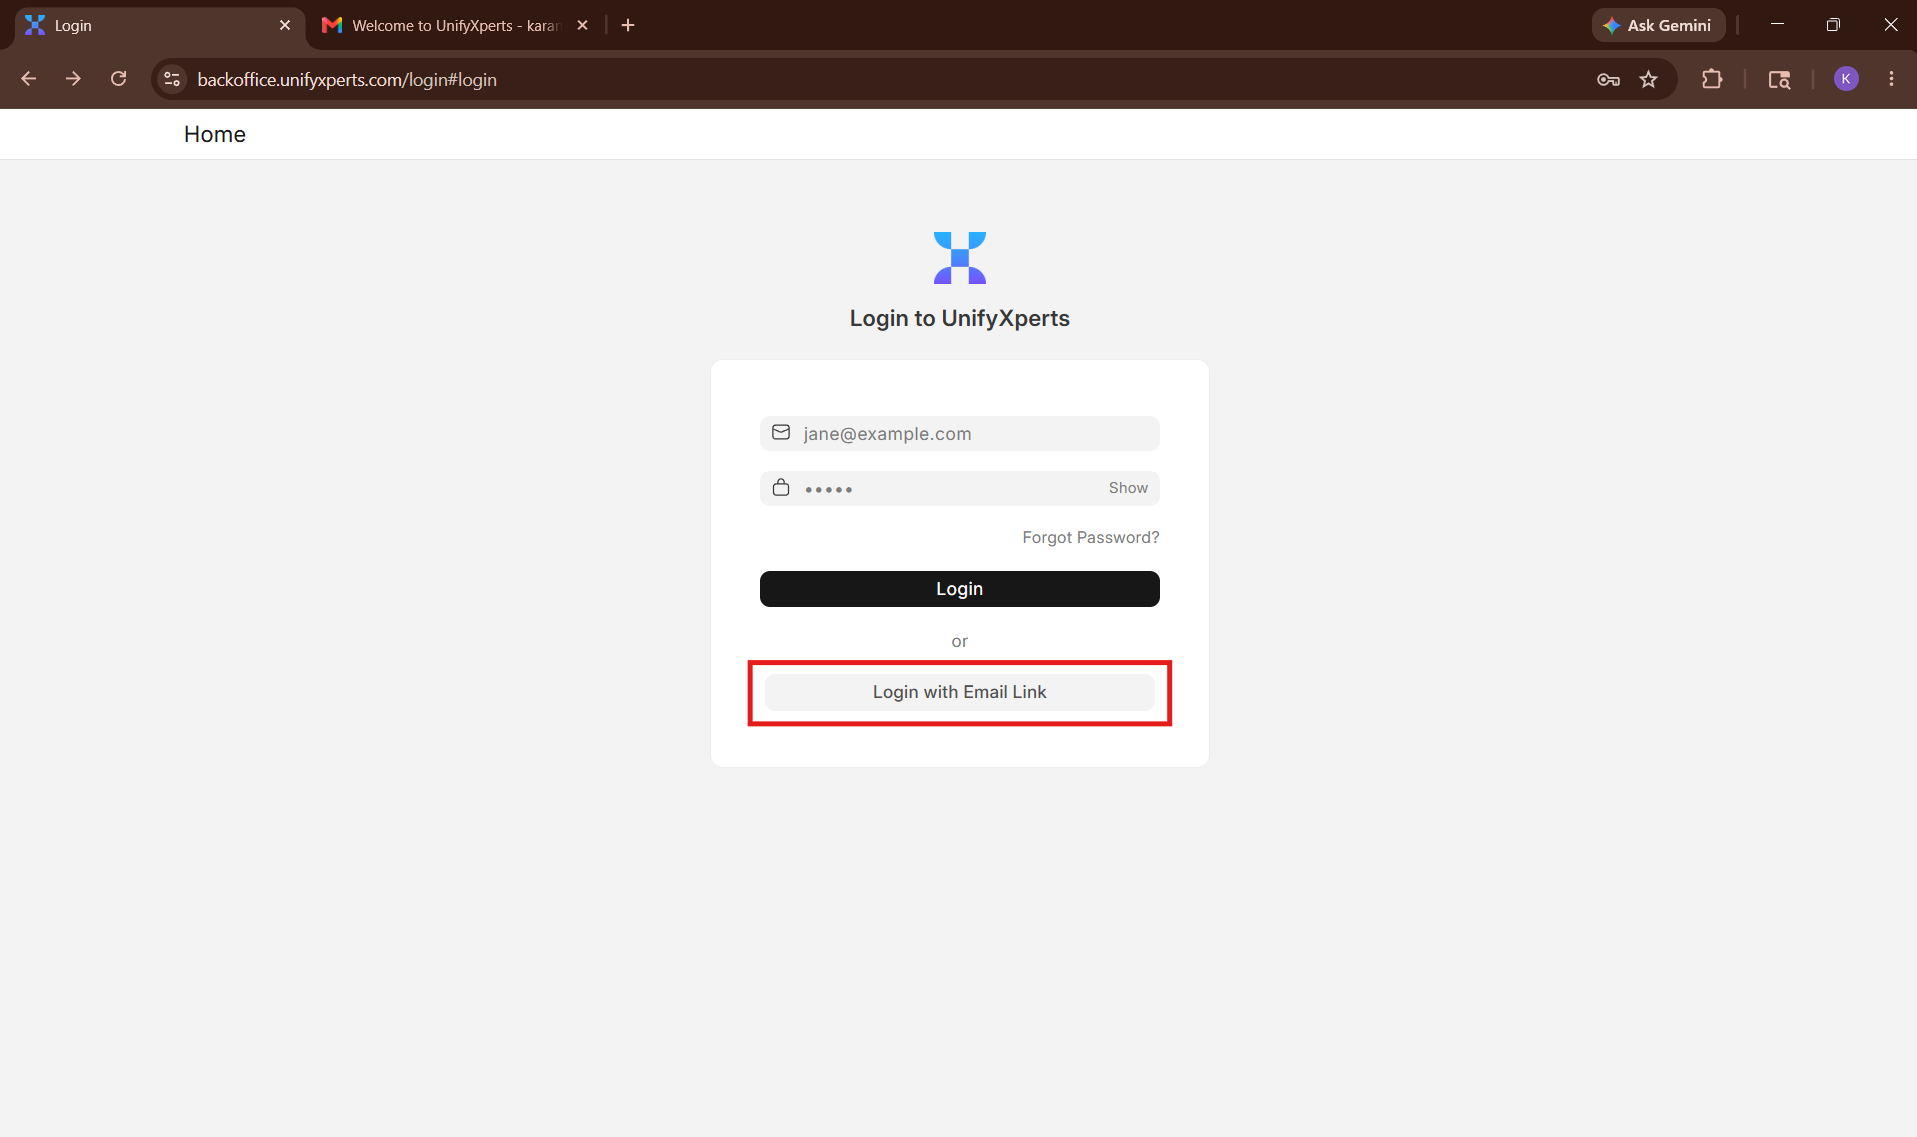
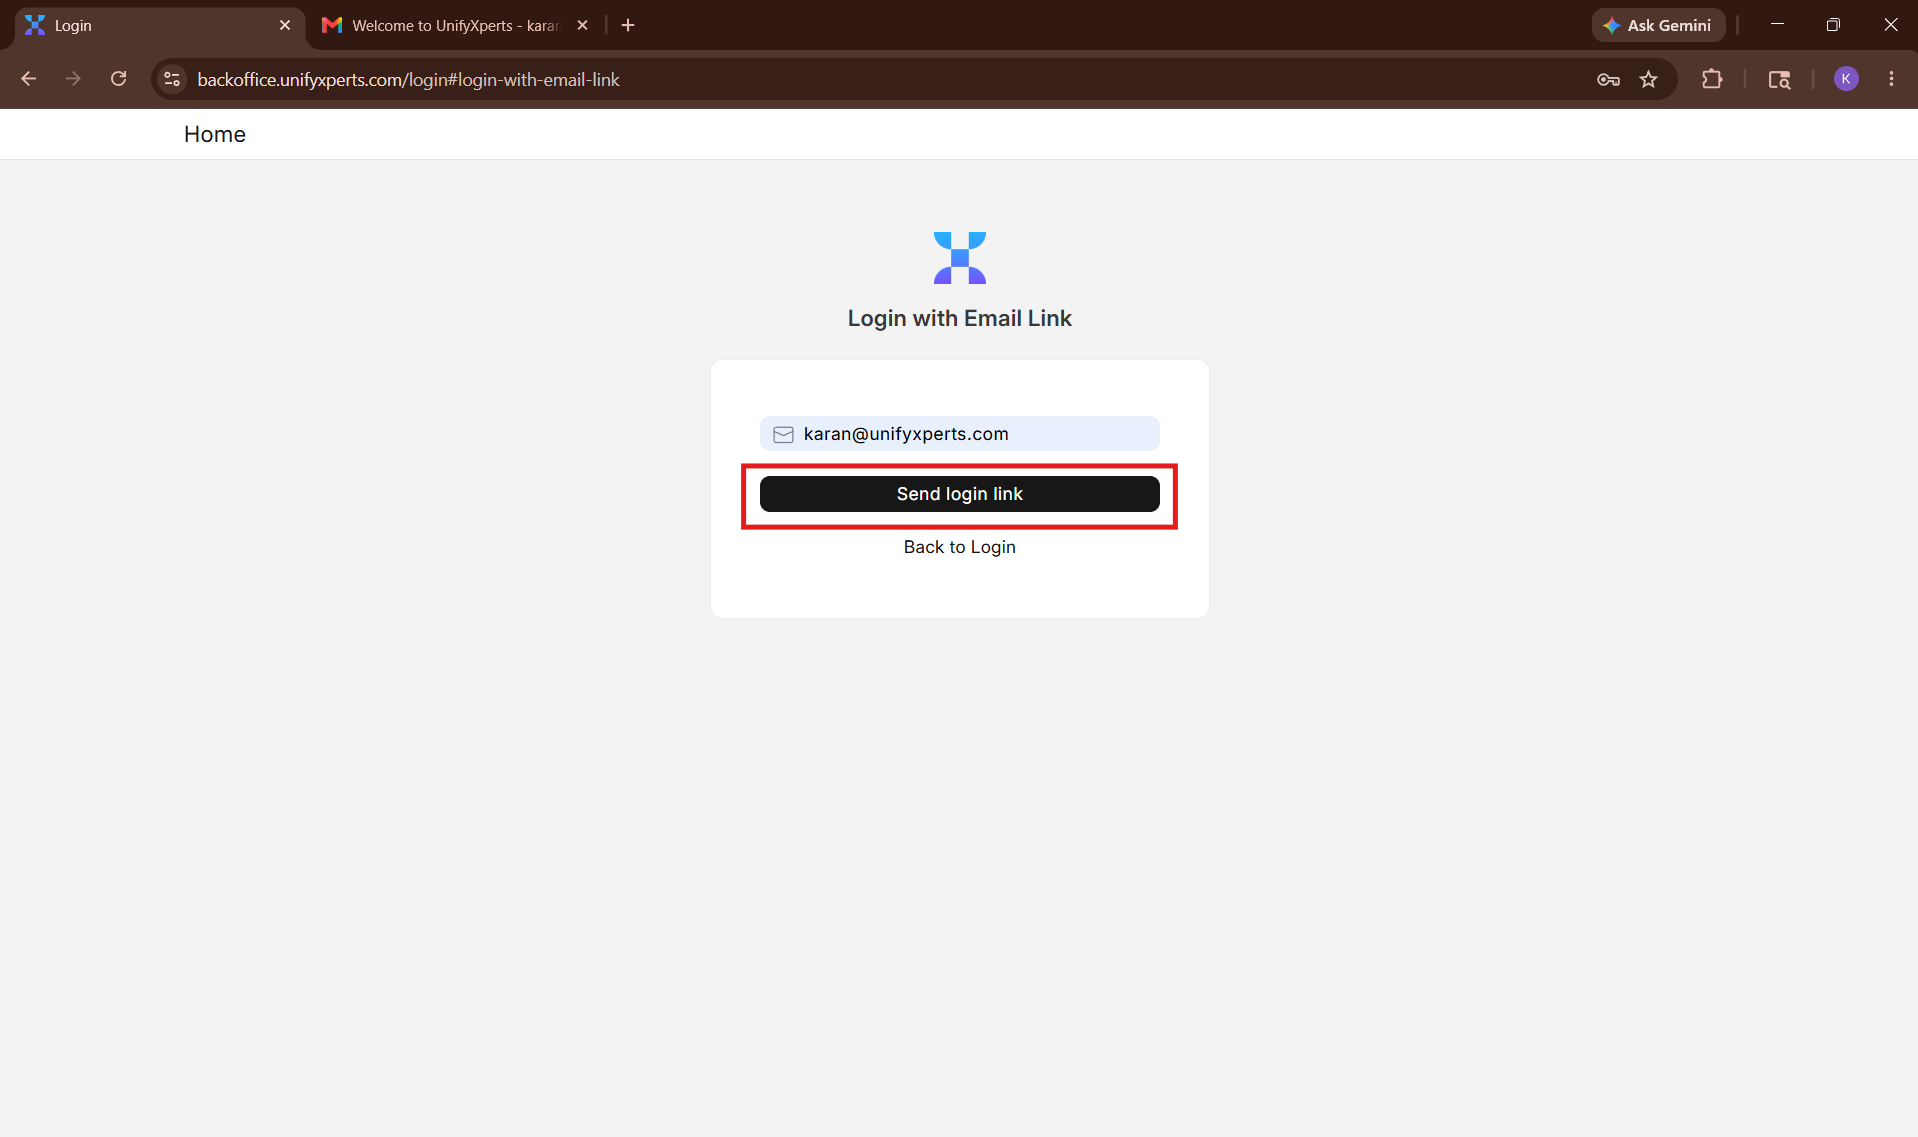
Enter your registered email address and click "Send Login Link".
Check your inbox. Open the email from UnifyXperts and click "Login To UnifyXperts".
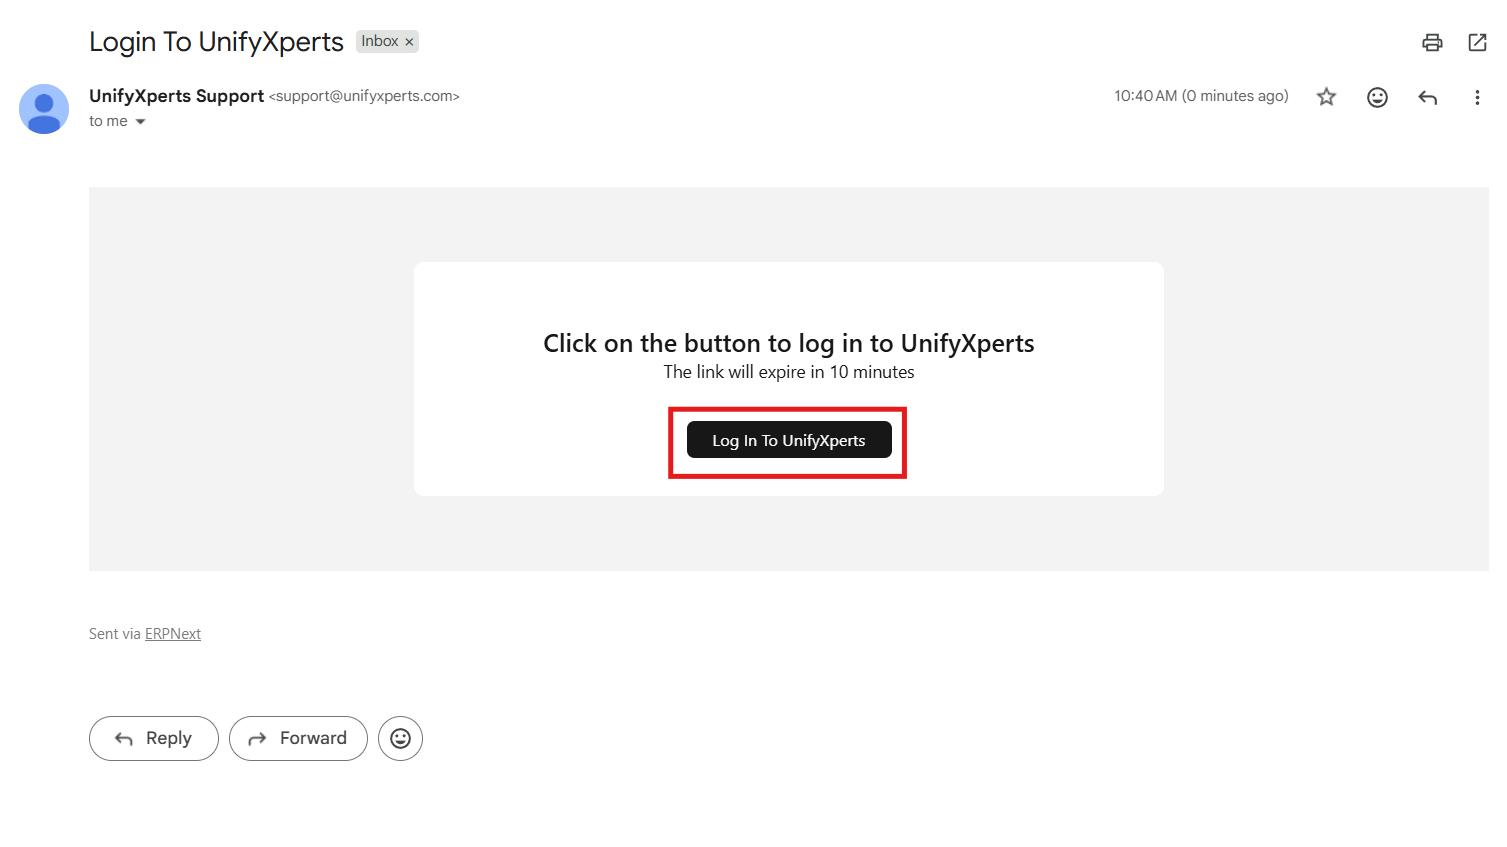
You may be redirected after clicking — navigate back to the Helpdesk URL.
4.3 Reset Password
Use this option if you want to permanently set a new password.
On the login page, click "Forgot Password".
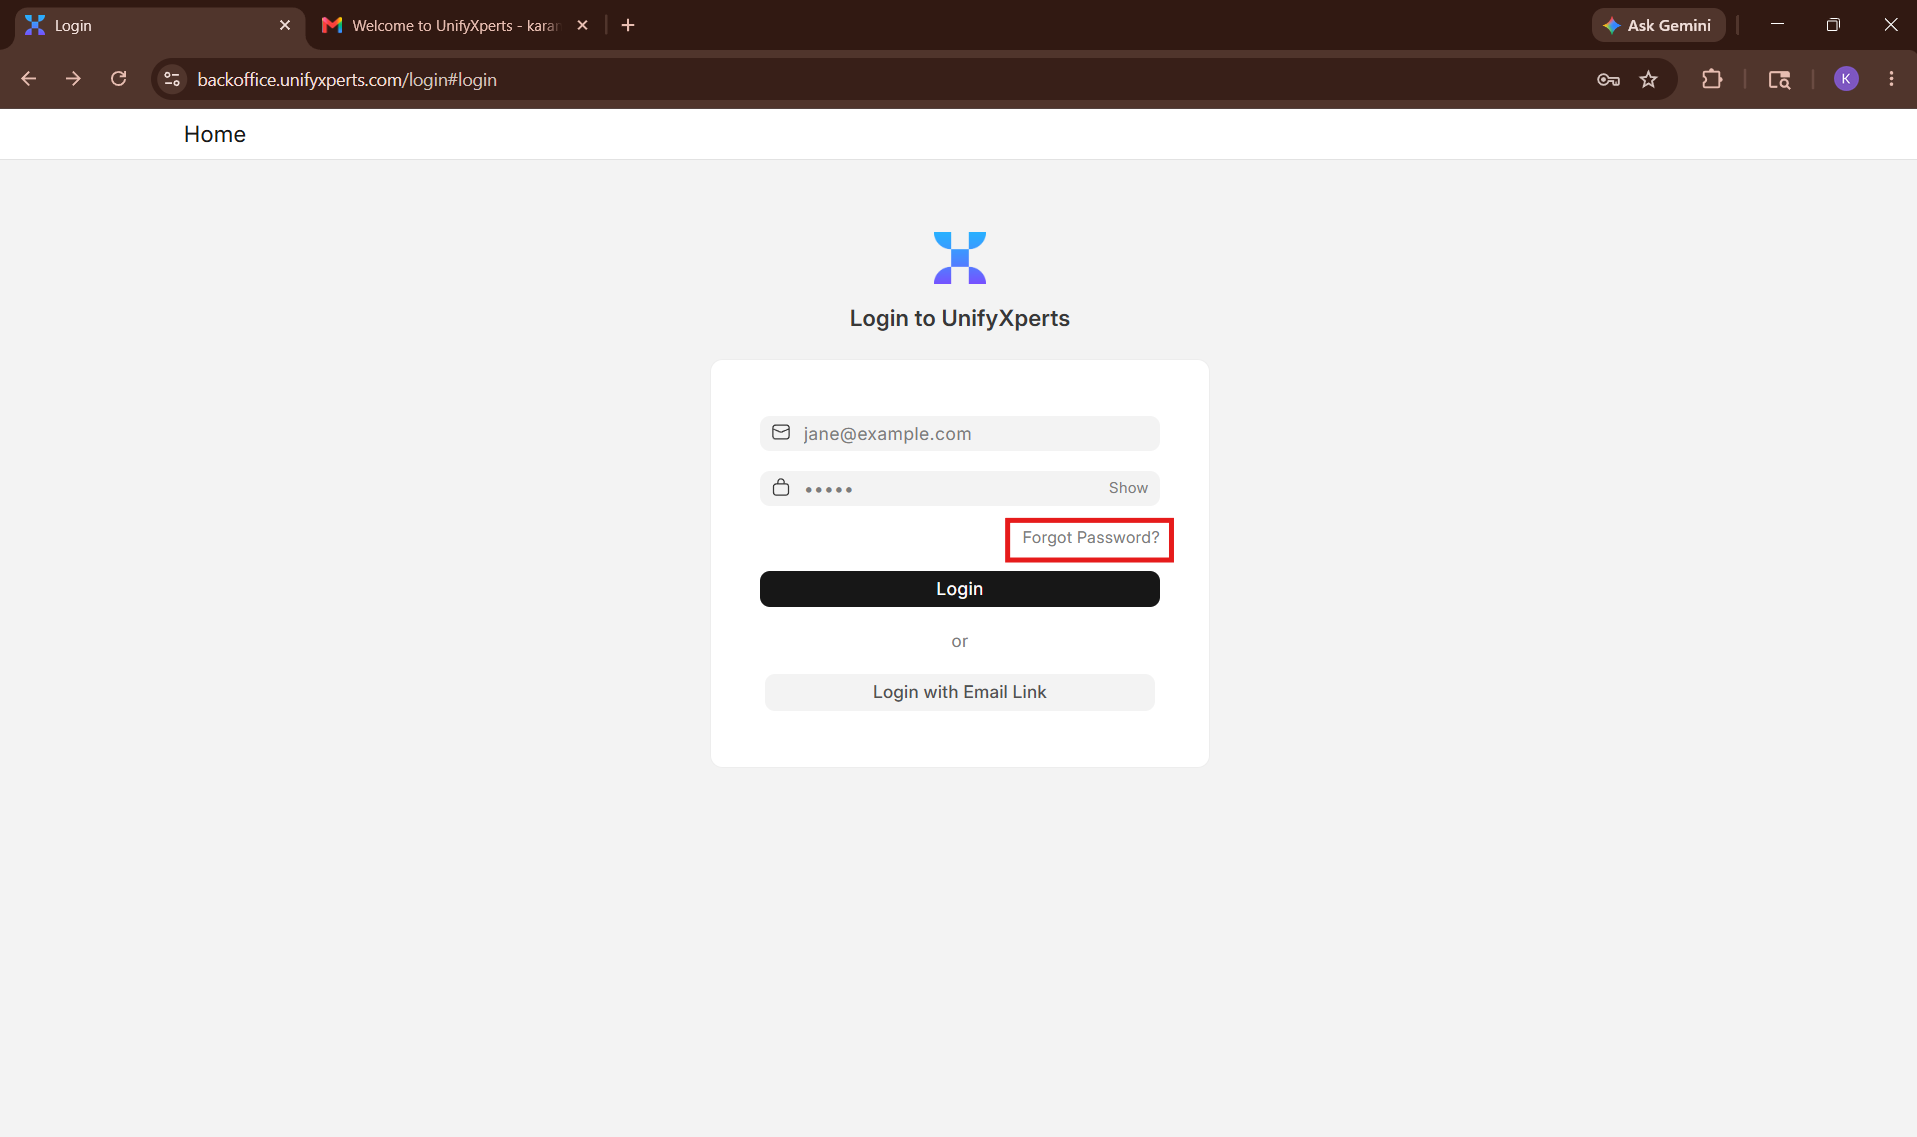
Enter your registered email and click "Reset Password".
Open the reset email from UnifyXperts and click "Reset Password".
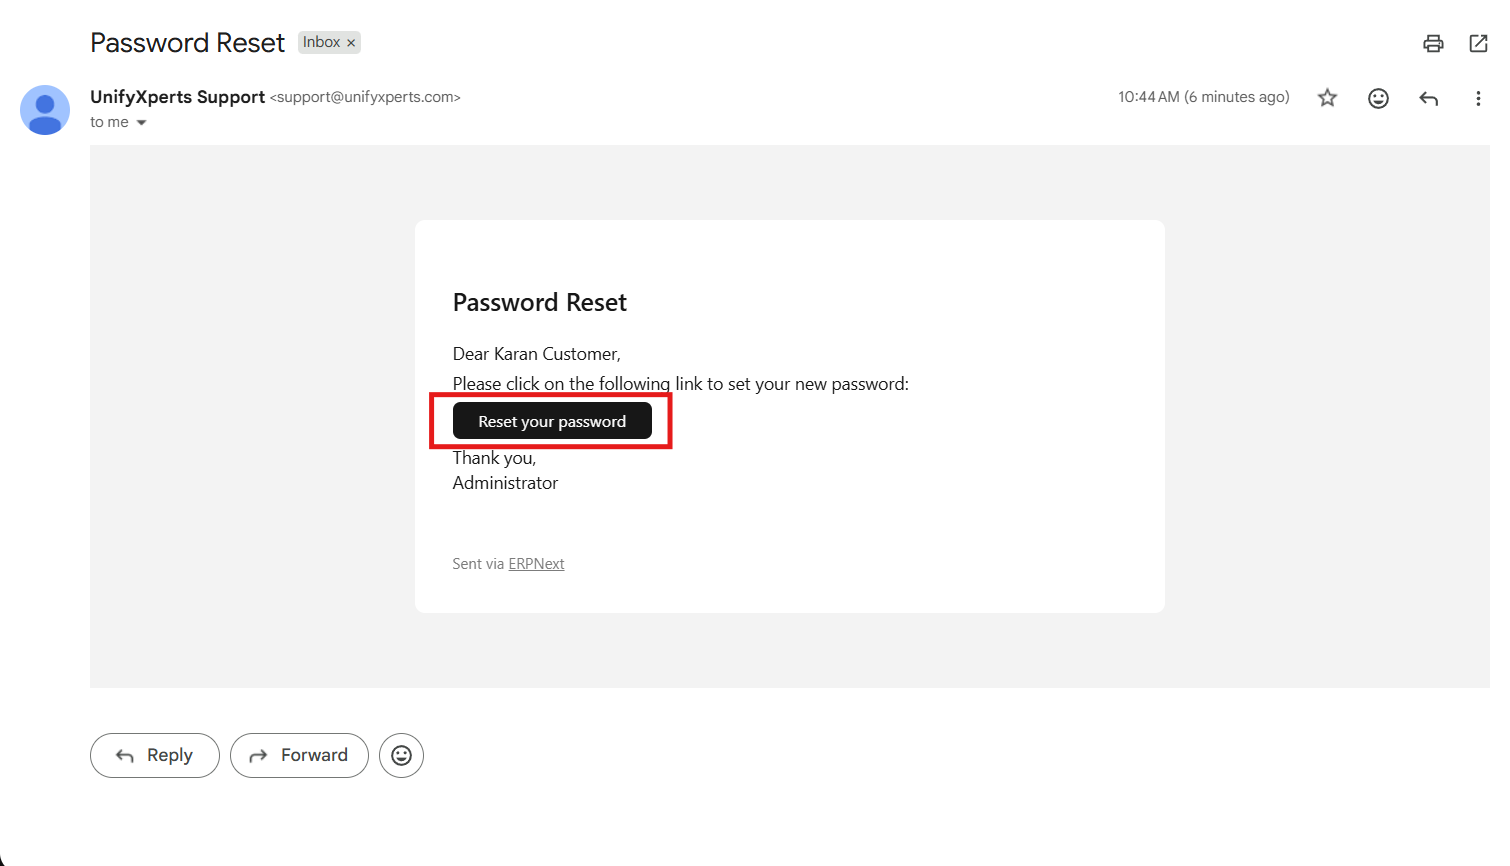
Enter your new password in both fields and confirm. You will be logged in automatically.
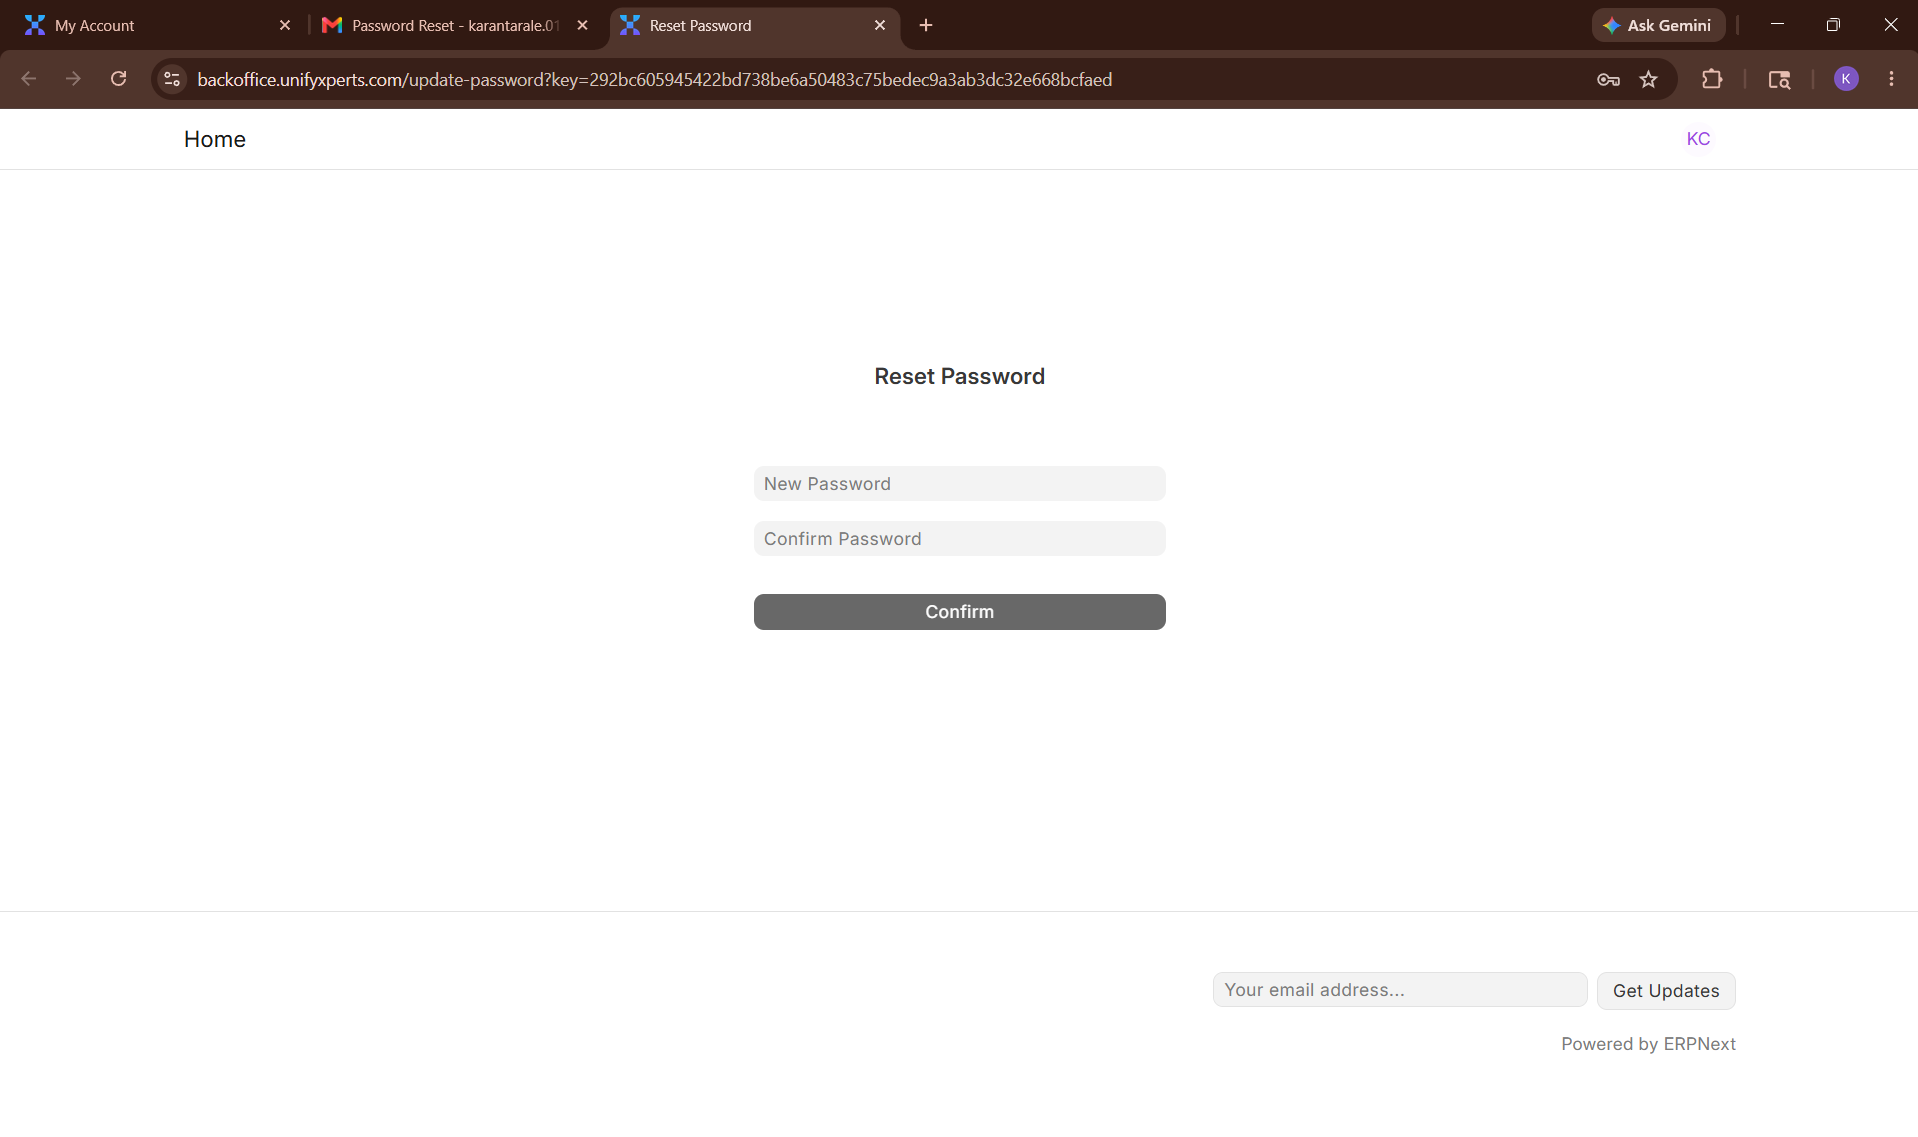
Navigate to the Helpdesk URL.
5. Creating a Support Ticket
5.1 Navigate to My Tickets
Once logged in, go to the Helpdesk URL. You will see your ticket list and a "Create" button in the top-right area.
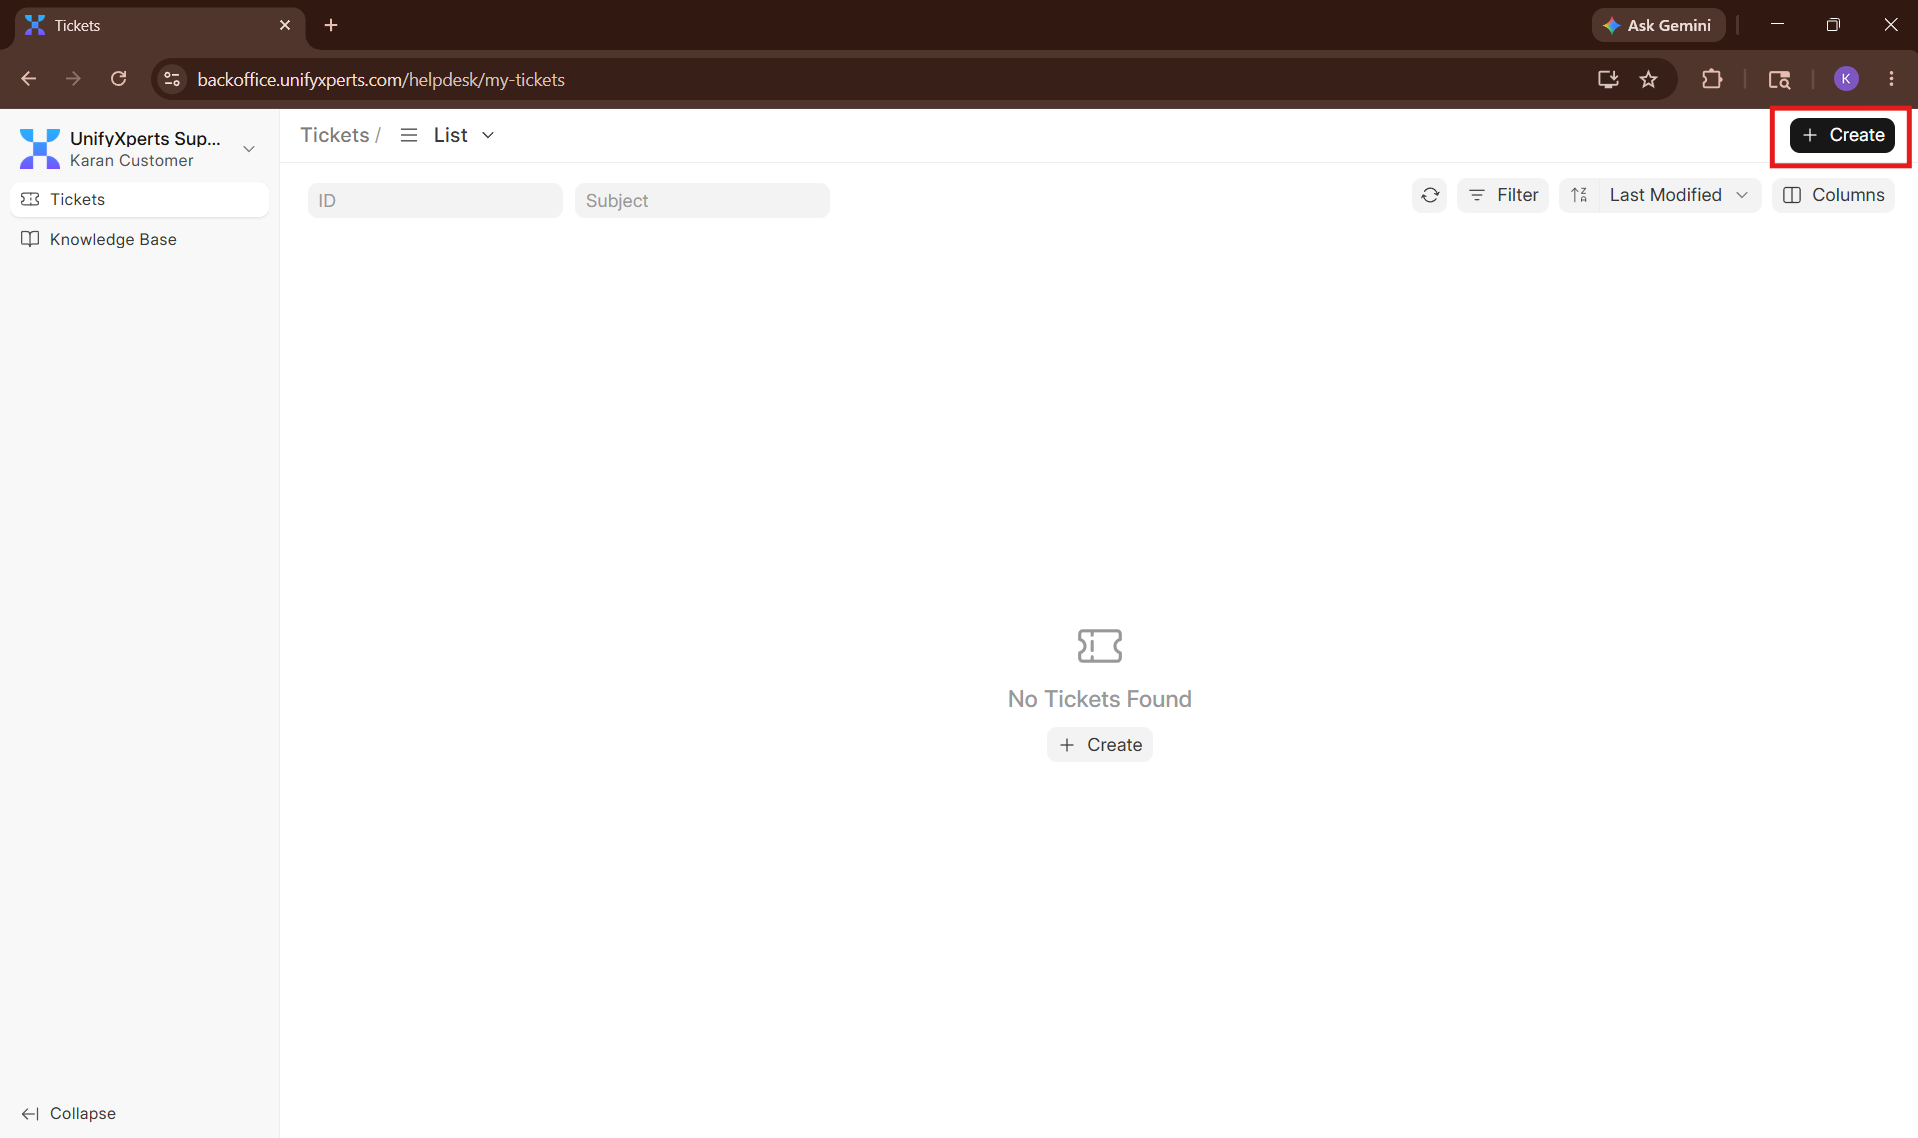
Click "Create" to open the ticket form.
5.2 Ticket Creation Form
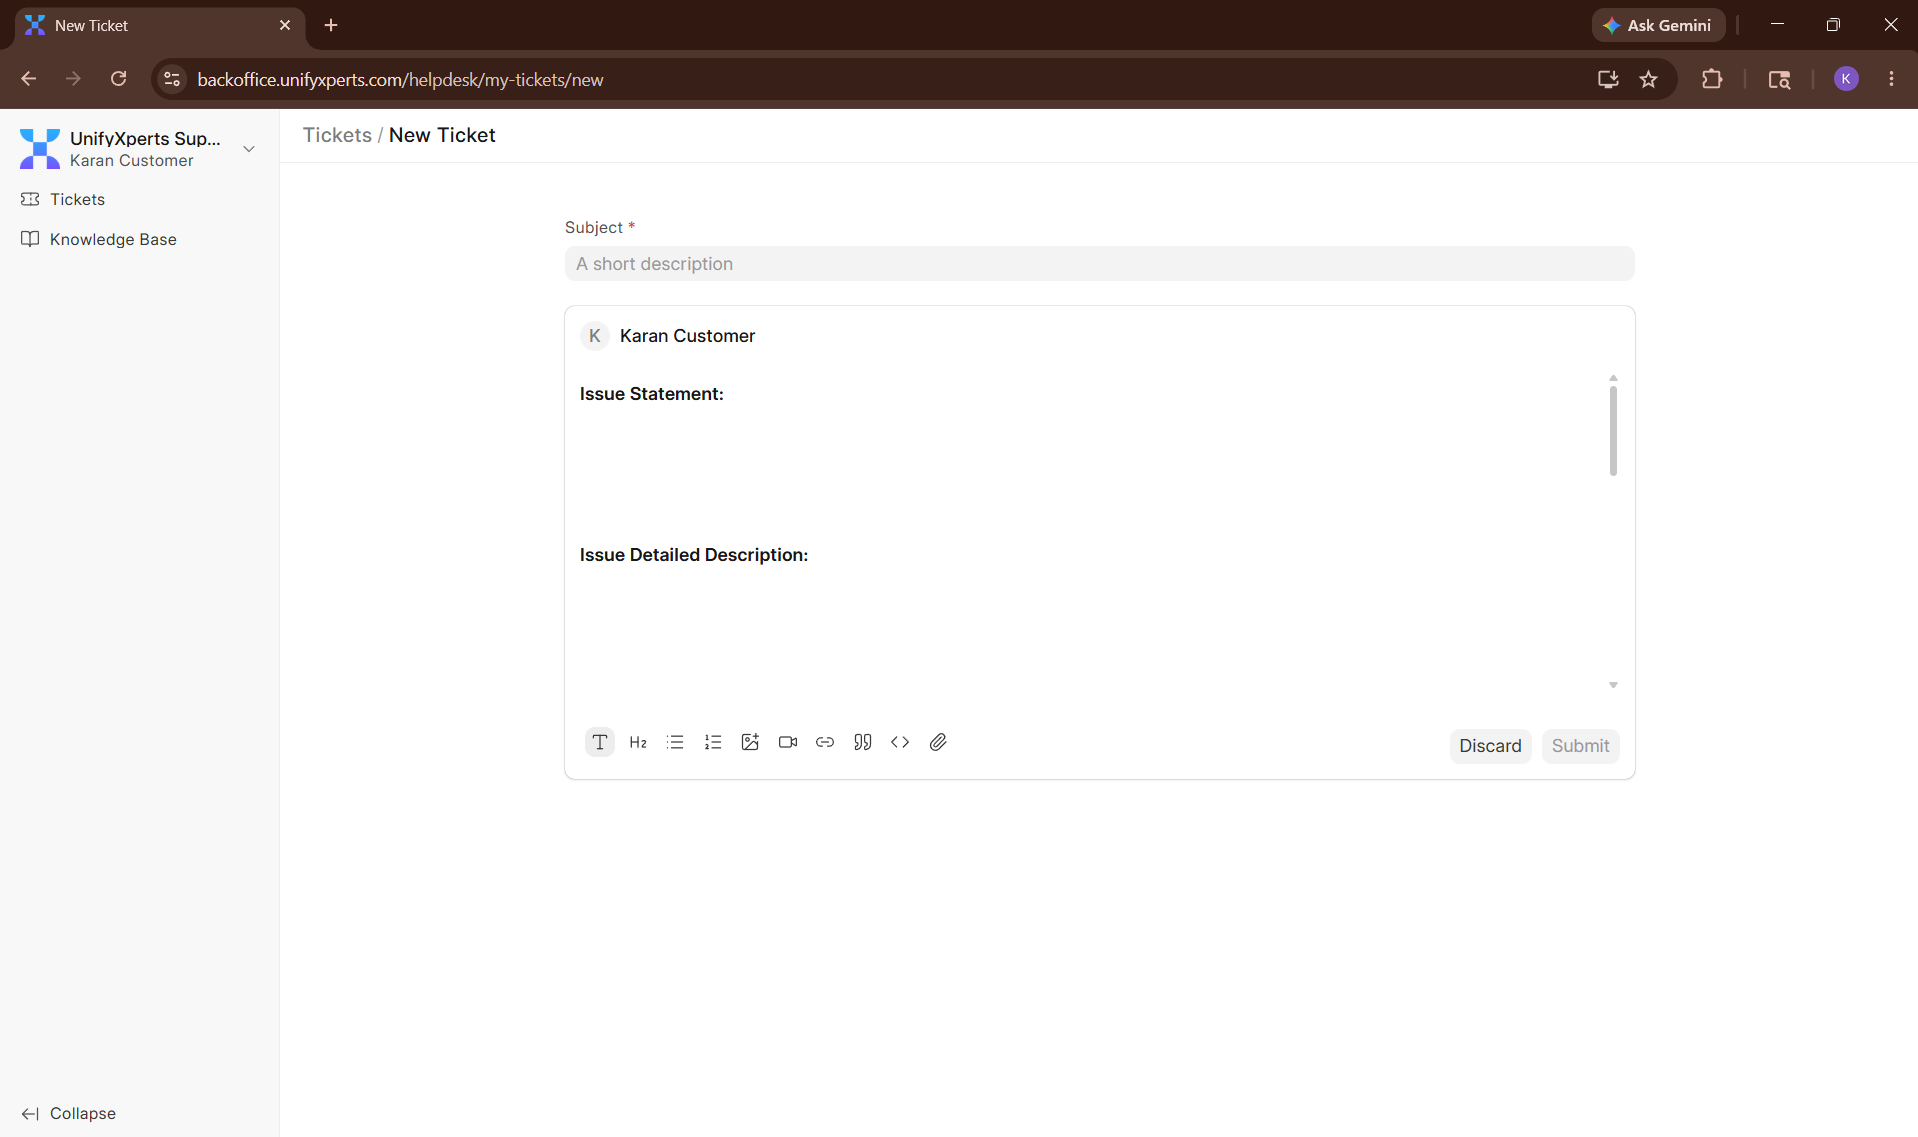
The ticket form will open. It has two main parts: a Subject at the top, and a Description body below.
5.3 Subject
Write a short, clear title that summarises your issue in one line. This is what the support team sees first.
| Good Subject | Poor Subject |
|---|---|
| Stock Ledger valuation incorrect after Landed Cost Voucher | Issue in system |
| Work Order not fetching BOM after Item change | Something is wrong |
| Sales Order PDF not generating for Customer ABC | Help needed |
5.4 Description Body — Sections to Fill
The description body must be filled using the following six sections. Each section serves a specific purpose:
| Section | What to Write |
|---|---|
| Issue Statement | A single sentence summarising the problem — the "headline" |
| Issue Detailed Description | Full context: which document, which module, when it started, what you were doing |
| Steps to Replicate | Numbered steps the support team can follow to reproduce the issue on their end |
| Current Behavior | Exactly what is happening right now (what you see) |
| Expected Behavior | What should happen if the system were working correctly |
| Supporting Screenshots / Documents / Videos / Dashboard Links | Attachments or links that visually show the issue |
💡 Why are all sections important? The support team cannot always reproduce an issue without precise steps and screenshots. Complete tickets are resolved significantly faster than incomplete ones.
5.5 Demo Example
Below is a fully filled-out example to guide you:
Subject: Stock Ledger entries showing incorrect valuation rate after Landed Cost Voucher
Issue Statement: Stock Ledger entries are being created with an incorrect valuation rate after submitting a Purchase Receipt with a Landed Cost Voucher applied.
Issue Detailed Description: When a Purchase Receipt is submitted and a Landed Cost Voucher is linked to distribute additional charges (e.g., freight, customs), the resulting Stock Ledger Entry reflects the original rate instead of the adjusted rate inclusive of landed costs. This causes incorrect stock valuation and mismatched accounting entries.
Steps to Replicate: 1. Create and submit a Purchase Receipt for Item A with rate ₹100/unit, qty 10. 2. Create a Landed Cost Voucher linked to the above Purchase Receipt with ₹500 freight charge. 3. Submit the Landed Cost Voucher. 4. Open the Stock Ledger Report and filter by Item A and the Purchase Receipt date.
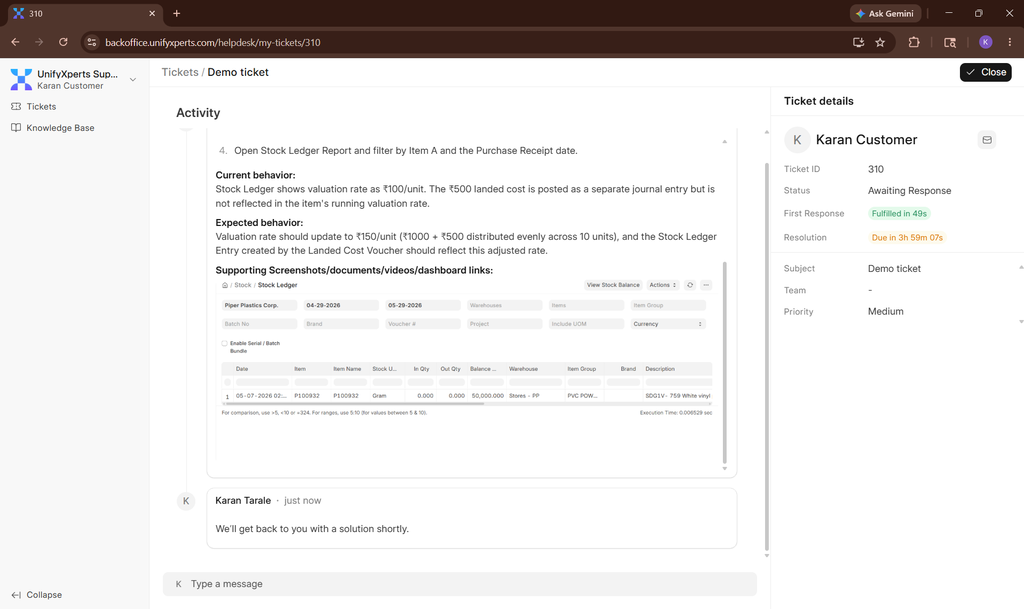
Current Behavior: Stock Ledger shows valuation rate as ₹100/unit. The ₹500 landed cost is posted as a separate journal entry but is not reflected in the item's running valuation rate.
Expected Behavior: Valuation rate should update to ₹150/unit (₹1,000 + ₹500 distributed evenly across 10 units), and the Stock Ledger Entry created by the Landed Cost Voucher should reflect this adjusted rate.
Supporting Screenshots / Documents / Videos / Dashboard Links: Stock Ledger Report screenshot and Landed Cost Voucher submission screen — (attached)
5.6 Submitting the Ticket
Once all sections are filled, click "Submit".
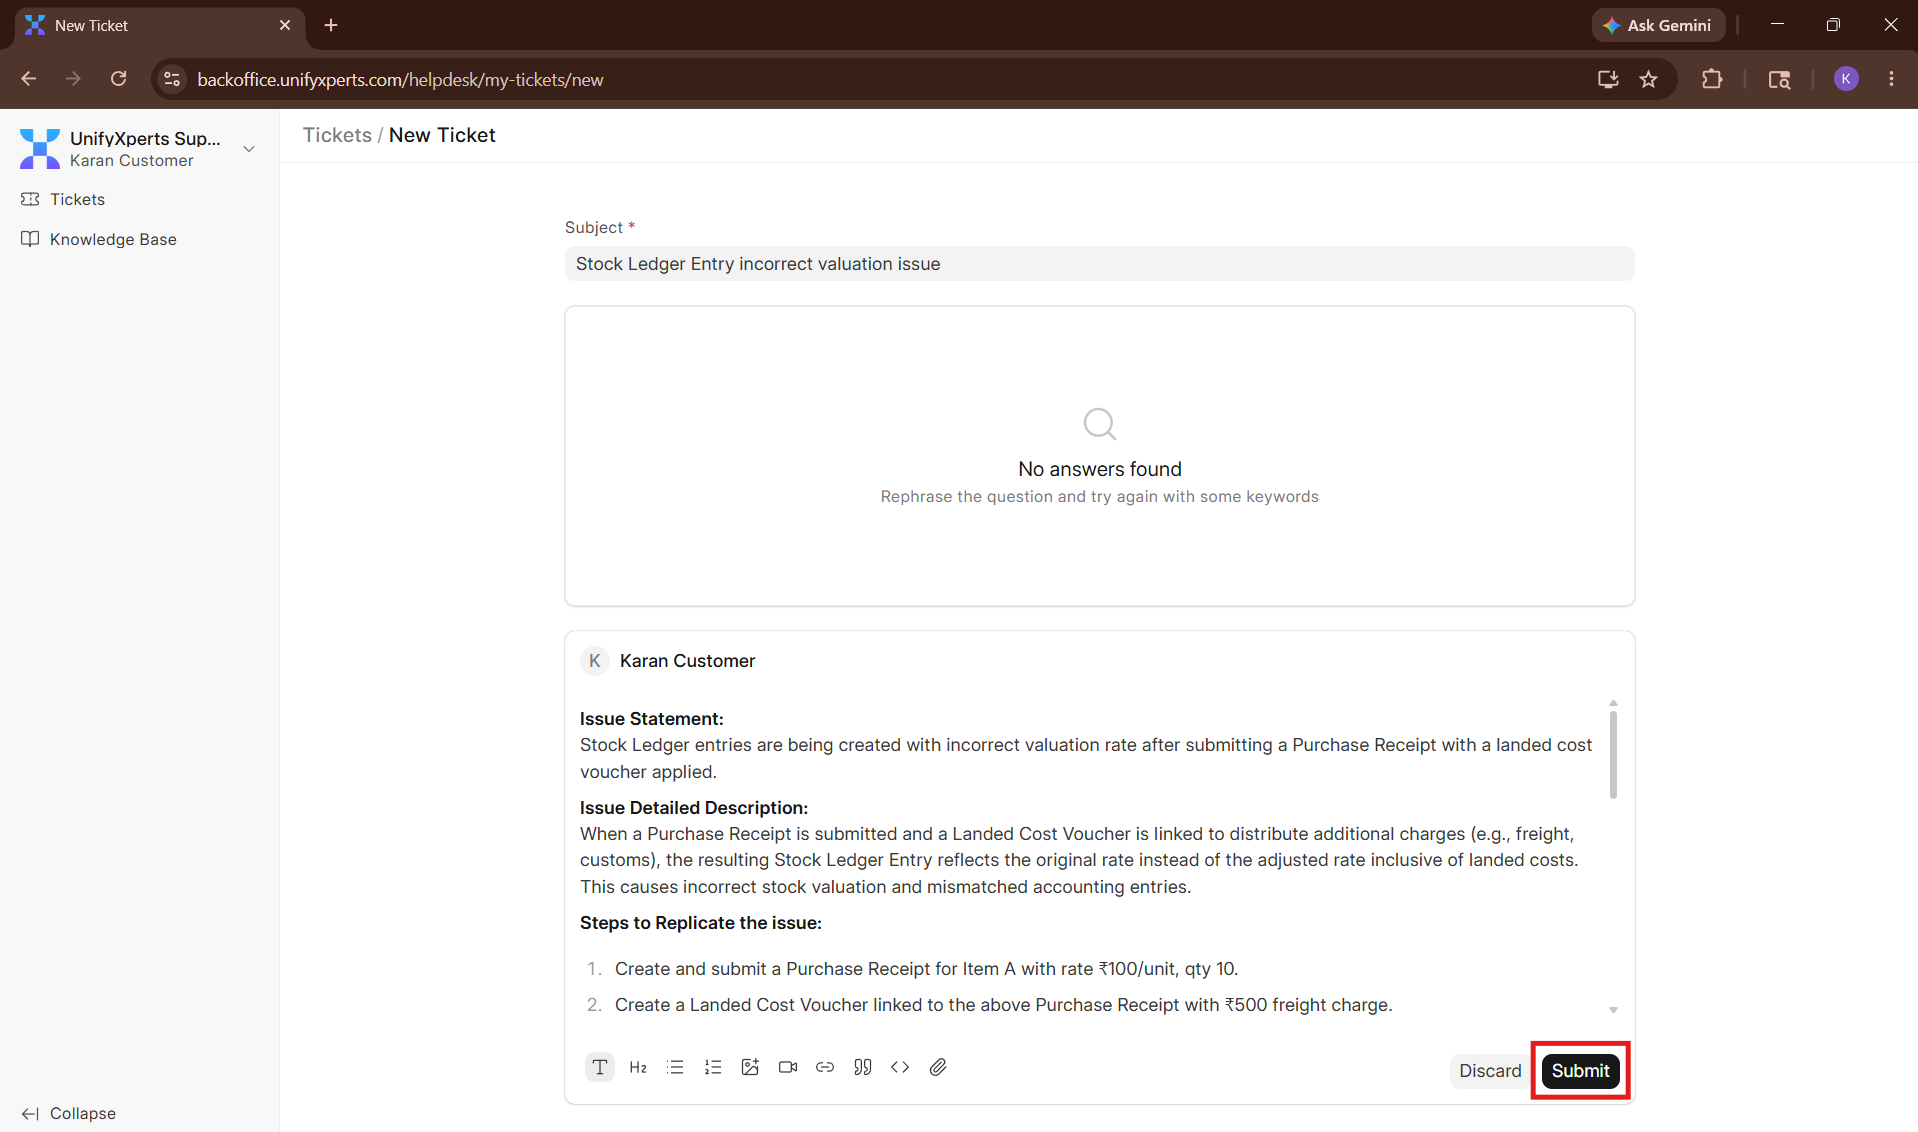
Your ticket will appear in the My Tickets list with a unique ticket ID and a timestamp.
6. After Submission — Tracking Your Ticket
Once submitted, open your ticket to view its status and the expected response time.
| What to expect | Details |
|---|---|
| Response Time | Shown on the right panel of your ticket |
| Initial Reply | The support team may ask for more information or confirm they are replicating the issue |
| Resolution | Once investigated, a solution or explanation will be sent as a reply on the ticket |
⏱️ Please wait for the committed response time before following up. If you have additional information to share (new screenshots, more steps), add them as a reply on the same ticket rather than creating a new one.
7. Closing a Ticket and Leaving Feedback
Once your issue is resolved, close the ticket so it is marked complete.
Steps to Close:
- Open the resolved ticket.
Click the "Close" button.
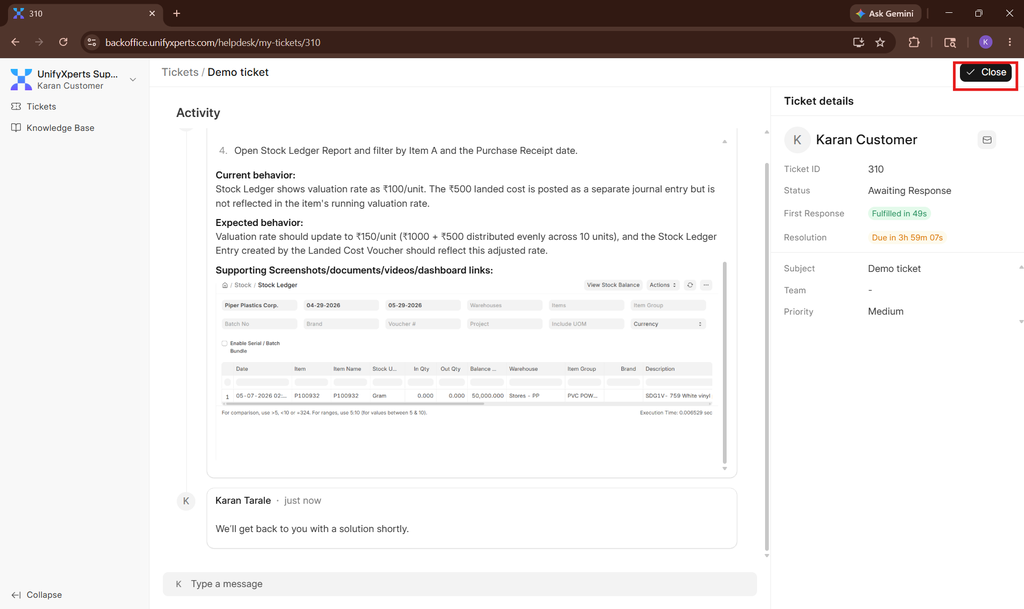
A feedback prompt will appear. Feedback is mandatory to close the ticket.
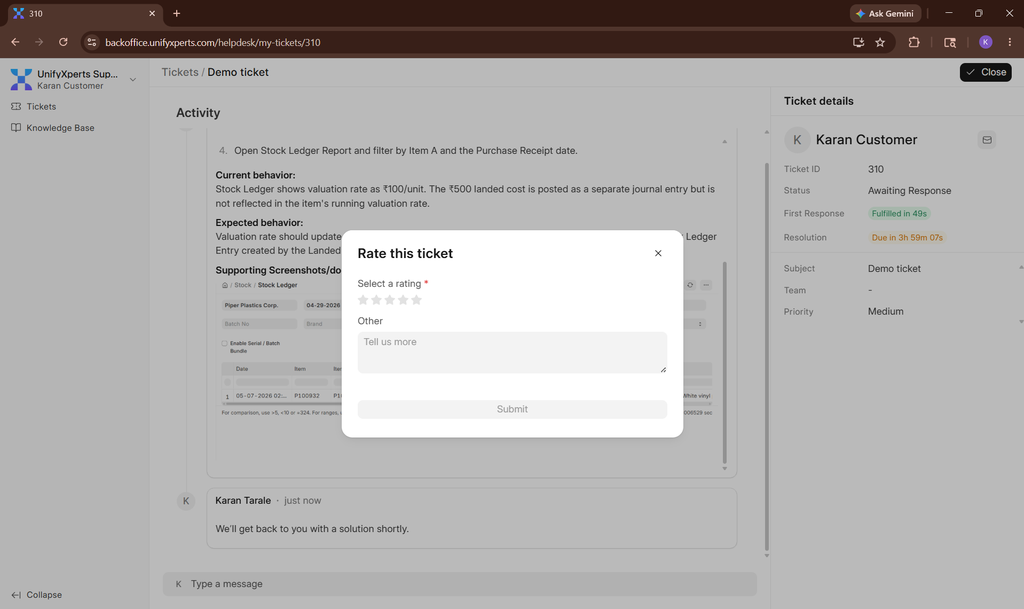
Rate the support and leave a comment, then submit.
🌟 Your feedback helps the support team improve. Even a short comment goes a long way.
8. Key Notes
- The Helpdesk URL is: https://backoffice.unifyxperts.com/helpdesk/my-tickets — always navigate here after login.
- After logging in, you may be redirected to a different page — this is normal. Use the URL above to get back.
- Raise one issue per ticket. Multiple unrelated issues in a single ticket slow down resolution.
- Always attach screenshots or a screen recording — it is the single biggest factor in faster resolution.
- Share the ERPNext URL of the document in question (e.g., the Purchase Receipt, Sales Order) instead of just describing it.
- Feedback is mandatory when closing a ticket.
9. Quick Reference
| Task | Steps |
|---|---|
| Access the helpdesk | Go to https://backoffice.unifyxperts.com/helpdesk/my-tickets |
| Log in without password | Login page → Login with Email Link → Enter email → Open email → Click Login To UnifyXperts |
| Reset password | Login page → Forgot Password → Enter email → Open email → Click Reset Password |
| Create a ticket | My Tickets → Create → Fill Subject + 6 sections → Submit |
| Track your ticket | My Tickets list → Open the ticket → Check right panel for response time |
| Close a ticket | Open ticket → Close → Leave mandatory feedback |
10. Summary
The UnifyXperts Helpdesk is the official channel for all support requests and queries. Using it ensures:
- Your issue is tracked with a unique ticket ID.
- The right team member is assigned.
- Response and resolution happen within committed timeframes.
- A record is maintained for future reference.
Always fill all six sections of the ticket description, attach supporting evidence, and close the ticket with feedback once your issue is resolved.
For account-related issues such as not receiving the registration email, contact your UnifyXperts account manager directly.